Thursday, June 19, 2014

Analyzing Me And Your Soil

About this time of year each year I have already been asked about 500 times.. "Jimmie what is the best fertilizer to put down on my yard?" I usually try to give a generic answer and move on because to really give folks an accurate answer to their question well, it takes more time than either one of us has. So to you 500 or so people hope you take the time to read further!
Testing your soil is the smart way to start and maintain your garden. Only by knowing the nutrient levels in your soil can you determine what you need to add to your garden in order to maximize growth. And yes
everyone's house can be a bit different.
A good quality Soil Test Kit results will give you the necessary information to make the correct fertilizer selections throughout the gardening season.
Knowledge of nutrient levels in your soil gives you an incredibly useful tool. Think of this information as you would any other necessary gardening tool and use it in achieving your goal of a successful garden.
What type of soil your garden contains is important to know because it influences how well nutrients and moisture will be maintained by the soil. There are two basic extremes in soil texture: sand and clay.
Sandy soil has large, gritty particles and will feel coarse when rubbed between your fingers, much like beach sand. Sandy soil is loose enough to allow for good airflow through the soil, but does not hold moisture or nutrients very well.
Clay soil has small, fine particles and will feel smooth between your fingers. Clay soil holds moisture and nutrients well, but can be difficult to dig or till during garden preparation because of its tendency to clump.
Most garden soils will be a combination of sand and clay. The ideal combination of sandy and clay soil is referred to as loam. Loam combines the beneficial properties of each soil type and provides your plants with the best growing environment. Loam is sandy enough to allow for drainage and air circulation, but also contains enough clay to retain adequate levels of moisture and nutrients. If your garden soil is not the perfect loam, don't worry most are not. Sandy and clay soils can be compensated for in the treatment and maintenance of your garden.
Now that you know what type of soil your garden contains, let's talk about the importance of testing the pH, Nitrogen, Phosphorus, and Potassium levels in your soil. Each of these elements performs a different function in the growth of plants.
PH-pH is not a nutrient; it is a measure of soil acidity or alkalinity. The pH level of your soil determines how well the plants are able to use the nutrients in the soil. In general, the ideal pH range for garden soil is 6-7. At this pH level, plants are able to draw adequate amounts of nutrients from the soil efficiently.
When the pH level of the soil is out of this range, plants are not able to use the nutrients in the soil efficiently. So a garden with good levels of Nitrogen, Phosphorus, and Potassium may still not live up to expectations if the pH level is out of range.
Although the nutrients are there, an incorrect pH level will prevent the plants from drawing what they need from the soil. Because soil pH has a tendency to drop over time, it is important to test it regularly.
Nitrogen-Nitrogen in your soil will affect the part of the plant that is above ground, especially the green, leafy sections. Correct levels of Nitrogen will promote healthy green foliage. Therefore, you will find that vegetables such as lettuce and spinach, as well as lawns, have high Nitrogen requirements.
Nitrogen is one of the most difficult nutrients to maintain in your garden as it is easily washed away by rain water. The Nitrogen level in your soil can, therefore, deplete quickly. For this reason, it is especially important to test regularly for Nitrogen.
Phosphorus-Phosphorus in soil is essential for strong root formation and root system development. Phosphorus also contributes to quicker flower and fruit production by helping to protect the plant against disease and poor weather conditions.
Potassium-Potassium is responsible for seed formation and germination in flowers, fruits, or vegetables. Obtaining maximum vegetable, flower, or fruit formation requires correct levels of potassium.
Soil testing is the only way to determine the levels of these nutrients in your soil. Results from your Soil Test Kit will help you make educated decisions when starting and maintaining your garden.

These elements to adjust pH can be found in your local lawn and garden retail store. They will be sold under different brand names, so look for ingredients on the package to find the correct pH adjuster.
Fertilizers that are pre-mixed are rated on their Nitrogen, Phosphorus, and Potassium contents. The ratings on a fertilizer package are always in this order: Nitrogen (N), Phosphorus (P), and Potassium (K). Therefore, the numbers specified on a fertilizer package (5-10-5 or 10-20-10) refer to the percentages of N, P, and K that are found in that particular fertilizer. There are a large variety of fertilizers available.
It is easy to find a pre-mixed fertilizer selection that will have a nutrient combination to suit the needs of your10-10-10, for example). Using this idea, you can easily pick out a pre-mixed fertilizer that will meet the needs of your soil.
soil. Simply look at your soil test results and identify which nutrient levels need to be increased. If your test results show that you need to increase your Nitrogen level, but your Phosphorus and Potassium levels are sufficient, look for a fertilizer selection that has a high N level and low or no P and K (25-5-5 or 25-0-0, for example). Or if all of your nutrients need to be increased, look for a fertilizer that contains all three nutrient levels in relatively equal amounts (20-20-20 or
Now you see when you stopped me at CVS or Exxon I couldn't really answer your question, we would've both been late!! Until next time…Happy Gardening!!!

Jimmie
WORRIED ABOUT THOSE PESKY MOSQUITOES?
READ THIS......!

Do you spend a significant amount of time  outside in your yard in summer? Then you know that insect bites are a fact of life. Such awareness could well save your life in this age of the West Nile virus, when insect bites can be deadly. But if you're concerned about the long-term health consequences of applying chemicals to your skin, then the use of natural mosquito repellants may be your solution to the challenge posed by West Nile virus. If we take "natural mosquito repellants" in the broadest sense, a number of options present themselves.

Natural Mosquito Repellants:

Plant oils: e.g., from citronella, castor bean or catnip plants

Certain bath oils, such as Avon's "Skin-So-Soft"

Devices such as the Mosquito Magnet

How you dress: avoid dark clothing

Attacking the problem at the source: mosquito-larvae control

Citronella products are widely used natural mosquito repellants
Some people burn citronella in a candle, while others apply it to the skin as topical oil. In the latter case, citronella is sometimes used in concert with other oils, derived from plants such as castor bean or catnip.
You've probably heard of high tech's answer for natural mosquito repellants: the Mosquito Magnet (and similar products). It's a device that gives off a gas simulating human breath, whereby it lures mosquitoes into its death chamber. There are also many Mosquito misting type systems that can be professionally or self installed as well.
Even how you dress can influence whether you suffer insect bites. Mosquitoes are drawn to dark-colored clothing. So while not technically "natural mosquito repellants," clothes that are light-colored can certainly be viewed as weapons in your mosquito-control arsenal.

From a Landscaping Perspective, What can be done About West Nile Virus?

Besides using mosquito repellants to protect your person against insect bites, those working on the landscape can take measures to help stop the spread of West Nile virus. Since West Nile virus is transmitted to humans via mosquitoes, and since the larvae of mosquitoes are found in standing water, one group of measures should obviously focus on sources of standing water in your landscaping. But just what those sources consist of can be far from obvious.

Prevention: Killing Mosquito Larvae

We know that fish eat bugs. So perhaps you've thought, "Too bad there isn't there a 'mosquito fish' I could put in my water garden to eat mosquito larvae." Well, believe it or not, the mosquito fish isn't a mythical beast, a benevolent creature found only in our dreams, like the mermaid. There really is such a thing as a mosquito fish!
I'll have more to say about the mosquito fish below. But first, let's consider the role of mosquito larvae in our war against West Nile virus.
Successfully killing mosquitoes is based on a simple yet important observation. When mosquitoes become adults, they rule the skies. Locating and killing winged bugs is difficult. Let's face it: the bugs are small and the sky is big. It's like trying to find a needle in a haystack.
Consequently, mosquito control that focuses instead on killing mosquito larvae or depriving mosquitoes of breeding grounds makes a lot of sense.
If you can eliminate sources of standing water on your landscaping (in which mosquito larvae are born), you're hitting mosquitoes where it really hurts. Or else you can kill the mosquito larvae while they're still confined to the water. They're sitting ducks while they remain wingless, swimming in an artificial pond, say, or a swimming pool -- because they're in a medium (water) that is contained in a finite, easily-managed area. This is the time to kill them! And you can even do so without resorting to chemicals, if you prefer, for instance:

By using BT bacteria (Bacillus thuringiensis), which attack mosquito larvae but pose no threat to other life forms.

Or by acquiring the eaters of mosquito larvae mentioned above, the aptly named "mosquito fish."
But before considering ways to kill the larvae in areas of your landscaping where you intentionally keep standing water, let's look at some of the sources of standing water that you might not immediately think of:

Water buckets and rain barrels.

Bottles and cans.

Empty plastic pots from the nursery and other concave odds and ends you threw in a pile behind the garage.

Old car tires (notorious rain-catchers).

That wheelbarrow you've been meaning to bring inside, as soon as you fix its flat tire....

Boat tarps or pool covers in which water can puddle.

Uneven areas in lawns or gardens where irrigation water can collect.

Clogged rain gutters and clogged drains.

Birdbaths and water bowls for pets.

Seepage from septic tanks.

But that still leaves the standing water that you wish to keep, such as that in swimming pools and water fountains. How can you kill the mosquito larvae which may be lurking in these places?

Keep swimming pools clean, aerated and chlorinated.

A bacteria called "Bti" (Bacillus thuringiensis) is often used for mosquito larvae control in standing water.

Aerate artificial ponds.

Avoid the temptation to mass aquatic plants together excessively in artificial ponds (mosquito larvae can hide from the fish if the vegetation is dense).

Stock artificial ponds with fish that eat mosquito larvae.

But which fish are the best eaters of mosquito larvae? Minnows and goldfish are common denizens of artificial ponds, and they do a fine job of eating mosquito larvae. But another fish, Gambusia affinis, has acquired such a reputation as an eater of mosquito larvae that it has been nicknamed, "mosquito fish." Contact your local municipality regarding the availability of mosquito fish in your area. Formerly an obscure species, the mosquito fish is now enjoying the limelight due to the West Nile invasion of North America.

I will to get to your questions next time, swamped with work!! Until next time…Happy Gardening!!


It's Really Okay To Hug That Tree !!


You know, most trees and shrubs in cities or communities are planted to provide beauty or shade. These are two excellent reasons for their use. Woody plants (like shrubs) also serve many other purposes, and it often is helpful to consider these other functions when selecting a tree or shrub for the landscape. The benefits of trees can be grouped into social, community, environmental and economic categories.
ab1Social Benefits: We like trees around us because they make life more pleasant. Most of us respond to the presence of trees beyond simply observing their beauty. We feel serene, peaceful, restful and tranquil in a grove of trees. We are "at home" there. Hospital patients have been shown to recover from surgery more quickly when their hospital room offered a view of trees. The strong ties of people and trees are most evident in the resistance of community residents to removing trees to widen streets. Or we note the heroic efforts of individuals and organizations to save particularly large or historic trees in a community.
The stature, strength, and endurance of trees give them a cathedral-like quality. Because of the potential for long life, trees are frequently planted as living memorials. We often become personally attached to trees that we or those we love have planted.
Community Benefits: Even though trees may be private property, their size often makes them part of the community as well. Since trees occupy considerable space, planning is required if both you and your neighbors are to benefit. With proper selection and maintenance, trees can enhance and function on one property without infringing upon the rights and privileges of neighbors.
City trees often serve several architectural and engineering functions. They provide privacy, emphasize views or screen out objectionable views. They reduce glare and reflection. They direct pedestrian traffic. They provide backgrounds, or soften, complement or enhance architecture.
Trees bring natural elements and wildlife habitats into urban surroundings; all of which increase the quality of life for residents of the community.
Environmental Benefits: Trees alter the environment in which we live by moderating climate, improving air quality, conserving water and harboring wildlife. Climate control is obtained by moderating the effects of sun, wind, and rain. Radiant energy from the sun is absorbed or deflected by leaves on deciduous trees in the summer and is only filtered by branches of deciduous trees in winter. We are cooler when we stand in the shade of trees and are not exposed to direct sunlight.
In winter, we value the sun's radiant energy; and because of this, we should plant only small or deciduous trees on the south side of homes. Wind speed and trees can affect direction. The more compact the foliage on the tree or group of trees, the greater the influence of the windbreak. The downward fall of rain, sleet and hail is initially absorbed or deflected by trees and this provides some protection for people, pets and buildings. Trees intercept waters, store some of it, and reduce storm run-off and the possibility of flooding. Dew and frost are less common under trees because less radiant energy is released from the soil in those areas at night.
Temperature in the vicinity of trees is cooler than that away from trees. The larger the tree, the greater the cooling. By using trees in the cities, we are able to moderate the heat island effect caused by pavement and buildings in commercial areas.
Air quality can be improved through the use of trees, shrubs and turf. Leaves filter the air we breathe by removing dust and other particulates. Rain-washes the pollutants to the ground. Leaves absorb carbon dioxide from the air to form carbohydrates that are used in the plant's structure and function. In this process, leaves also absorb other air pollutants such as ozone, carbon monoxide, and sulfur dioxide, and give off oxygen.
By planting trees and shrubs, we return to a more natural and less artificial environment. Birds and other wildlife are attracted to the area. The natural cycles of plant growth, reproduction and decomposition are again present, both above and below ground. Natural harmony is restored to the urban environment.
Economic Benefits: Property values of landscaped homes are 5-20% higher than those of non-landscaped homes. Individual trees and shrubs have value, but the variability of species, size, condition and function makes determining their economic value quite difficult. The economic benefits of trees can be both direct and indirect.
Direct economic benefits are usually associated with energy costs. Air conditioning costs are lower in a tree-shaded home. Heating costs are reduced when a home has a windbreak. Trees increase in value from the time they are planted until they mature. Trees are a wise investment of funds since landscaped homes are more valuable than non-landscaped homes. The savings in energy costs and the increase in property value directly benefit each homeowner.
The indirect economic benefits of trees are even greater. These are available to the community or region. Lowered electricity bills are paid by customers when power companies are able to use less water in their cooling towers, build fewer new facilities to meet peak demands, use reduced amounts of fossil fuel in their furnaces and need fewer measures to control air pollution.
Communities can also save if fewer facilities must be built to control storm water in the region. To the individual these savings are small, but to the community, reductions in these expenses are often in the thousands of dollars.
Trees provide numerous aesthetic and economic benefits but also incur some costs. You need to be aware that an investment is required for your trees to provide the benefits that you desire. The biggest cost of trees and shrubs occurs when they are purchased and planted. Initial care almost always includes some watering. Leaf, branch and whole tree removal and disposal can be expensive. To function well in the landscape, trees require maintenance. Much can be done by the informed homeowner. Corrective pruning and mulching will give trees a good start. Shade trees, however, quickly grow to a size that may require the services of a professional.

I apologize for not getting to all your questions I have been getting. It’s our busiest time of year and simply have not had sufficient time to do so. The good news is your all getting personal replies from me (although it may 2:00 am when you get them!) Until next time…Happy Gardening!!

Saturday, May 10, 2014

Want a great container garden?? Here's how

Want a great container garden?? Here's how


Living in the Dallas area you can grow almost anything in a container. A simple potted basil plant could be considered a container garden, but there are so many other possibilities.
Gardening in pots and containers gives you the ability to insure great soil, experiment with color, move your garden with the sun and raise your garden to a comfortable working height.
Maybe the best feature of container gardening in the Dallas area is the ability to create a whole new garden every time. Here are some tips to enhance your success!

1) Establish the Size of Your Container Garden

Make sure there is enough room in the container for the plants and soil. Take into account the mature size of the plants and their growing habits. Upright growers will need a wide base for balance. Sprawlers will need a pot deep enough to drape over.
As the plants grow, the root systems will fill the pot and the soil will dry more quickly. It's OK to fill the diameter of the container with plants, but make sure there is plenty of room for the roots to move downward into soil.

2) Provide Good Drainage

Always have drainage holes or at the very least, a 1-2 inch layer of gravel at the bottom of the container. If you are using a decorative pot without drainage holes, consider planting in a plastic pot with holes that is one size smaller than the decorative pot and using the plastic pot as an insert.

3) Soil Requirements for Container Gardens

Use a good potting soil mix, not garden soil. A mix with peat, perlite or vermiculite will retain moisture longer and yet be well draining. It will also be lighter and won't compact as the season goes on. Using a chunky-style potting mix in container of 5 or more gallons will help the soil mix remain loose even longer.

4) Choose Plants with Similar Cultural Requirements

In a garden bed, you can select which plants need water and which to pass over. Not so with a container garden. Select plants that will be happy with the same amounts of water, sun, heat and food.
Avoid aggressive spreaders that will compete with neighboring plants and consider dwarf varieties.

5) Favor Drought Tolerant Plants

Most container gardens are going to require daily watering in hot weather. Even so, there will be times when you potted plants are going to be baking in the sun. Give your container a fighting chance by favoring plants that can handle the intensified heat and dry soil of a container garden.

6) Balance the Size of Your Plants and Your Container

Container gardens look best when the plants are in balance with the container. Try to make sure your tallest plants are not more than twice the height of the container and that the fullness of the plant material is not more than half the width again as wide.

7) Judging Sun Exposure

Try not to site containers in full mid-day sun. You may have chosen plants that say they require full sun, but container gardens heat up much more quickly and intensely than in the ground gardens. Most plants will welcome some relief from mid-day sun.
On the other hand, when you must position a container in the shade, consider putting it by a wall that can reflect some light back. The plants won't suffer from the extreme heat, but they will benefit from indirect light.

8) Watering Container Gardens

Lack of water can quickly kill plants in a container garden. Unlike plants grown in the ground, container plant roots can't move down deeply in search of subsurface water. Check your containers daily for water needs. Check twice daily in the heat of summer and especially with smaller containers.

9) Fertilizing Container Gardens

Some potting mixes come with fertilizer already mixed in. Some don't. Either way, container plant roots can't spread out looking for additional food in the soil nearby, so you will need to replenish soil nutrients regularly.
Good choices are a time released fertilizer mixed in when planting or a water soluble fertilizer every 2-4 weeks.

10) Keeping Container Gardens Fresh

Don’t be afraid to switch out plant material for the change of season. No plant can go on blooming for ever. When one plant starts to fade, look for another to take its place. This way you can start your container
garden in the spring and go until frost. With container gardens, sequence of bloom is entirely within the gardener's control.

Question: Jimmie, I kept my Hibiscus tree in the garage over the winter. It did not freeze, however it does not look very good. What is the best process for getting it back into good shape for spring? Rachael P. in Prosper

Answer: Hi Rachael, Hibiscus and other tropicals in general suffer when they are in cool, dark conditions for an extended period of time. Your best bet would be to trim and reshape it, and then repot it into fresh planting soil and feed it. It will do best in spring full sunlight. By the summer however, you would probably want to move it back in a location that gets mainly morning sun and some afternoon shade.

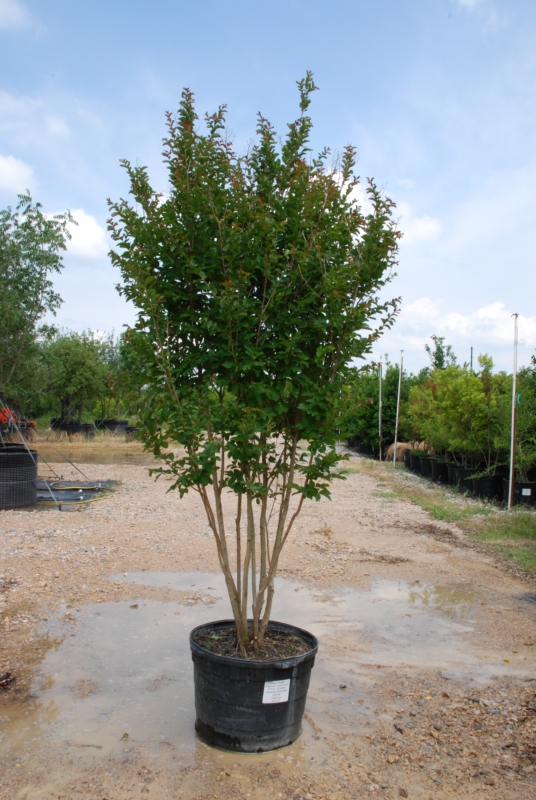
Question: Jimmie, Is it too late to cut back or prune my Crape Myrtle trees? If not how is the best way? Katrina L. in Prosper.

Answer: Hi Katrina, Now that the sap has come up through the trunk and the ornamental trees have foliage it’s a little late. Pruning on Crape Myrtle trees should be done when they are dormant (November thru late February). When pruning them be sure to remove any old buds from the previous bloom and remove any limbs the size of a number 2 pencil or smaller leaving just the main trunks and canopy of the tree.

Until next time…Happy Gardening!!

Thursday, April 24, 2014

Want to Plant Roses? Here's how

Roses are not as fragile as they might appear and you could probably plant them in a hole here in the Dallas area and have some success. But a little extra effort when planting your roses will pay off with a much healthier plant and more prolific blooms. Here are some tips and tricks of the trade for how to plant roses.

Where to Plant Roses

Choose a site with full sun to partial shade. Six hours or more of sun is best. There are some roses that will be perfectly happy in partial shade, but most roses bloom their best if they are in a spot that gets sun all day. (Think soccer field!) The exception to this rule of thumb would be when roses are grown in areas with extremely hot growing seasons and limited water. In that case, you roses will appreciate the relief offered by some afternoon shade. (Ring a bell???)

Roses are not terribly picky about soil, but since they are a heavy feeding plant, a rich loam type would be ideal. The soil pH can be slightly acidic to neutral (5.5 to 7.0). It is usually advisable to work in several inches of organic soil conditioners, especially if you have poor soil or heavy clay. (Uhh- Hello Dallas area ring another bell??)

Make sure the soil has good drainage. Roses need regular deep watering, but their roots will rot if left to sit for days in wet soil. (Raised beds are even better)

And finally, do not crowd your rose bushes. The more air flow around the plants, the less likely they will be to get fungal diseases, like black spot and powdery mildew, on their leaves. (Pay attention here, all you low maintenance folks)


How to Plant Rose Bushes

Dig out a hole that is slightly wider, but about as deep as the roses root ball. This will generally be about 15–18 inches deep x 18–24 inches wide.

Mix a handful of bone meal or superphosphate into the soil you removed from the hole and save it for refilling the hole, once the rose is planted.. This will help the rose bush acclimate to its new home. Don’t feed with anything else at planting time. You want the roots to take hold, before the top start sending out a lot of new growth.

If your rose came in a container, gently remove it from the pot and loosen the roots a bit.

If your rose is bare root, soak the roots for about an hour, before planting.

Make a mound in the center of the hole, with the soil and superphosphate mix. Make the mound high enough so that when you place the rose bush on top of it, the knobby graft union is barely below soil level. When the plant settles, the graft union should be fully buried, about 1 inch underground.

Gardeners in our warm Dallas area climates may prefer to leave the bud union above ground, since there is little chance of frost damage. You can bury the graft no matter where you are gardening, but there is a chance that sprouts will grow from the root stock, resulting in a plant different from the one grafted on top.

Spread the roots down the sides of the mound. Begin filling in with the soil and superphosphate, keeping the roots as spread as possible. Water the soil when the hole is just about filled, to help settle it in. Continue filling the hole and gently pat down.

Water deeply and apply 1–2 inches of mulch. (Shredded cedar is the best) Water at least once per week. (an inch or so)

Additional Tips:

If there is still a chance of deep freezing temps, you can loosely pile soil or mulch around the base of the rose canes, to keep them from drying out. Remove this soil when the temperatures warm.

Prune back the canes of larger rose bushes that are being transplanted to 6–8 inches long

Caring for Roses after Planting

Continue to water every week, so that the plants develop a deep roots system.

Feed roses when they start to leaf out in spring and after each flush of bloom or about every six weeks throughout the growing season.

Stop feeding about 6 weeks before your first frost date, but continue watering.


Question: Jimmie, I have several shrubs and perennials that seem to have been hit pretty hard by our unforgiving winter. Some are showing a tiny bit of new growth, shouldn't they be leafed out by now. Should I just go ahead and replace them, I really don't want to wait an entire growing season or two for them to recover. Thank you for your thoughts, I really enjoy your columns! Jill L. in Prosper

Answer: Hi Jill, It was indeed an unusually hard winter on many trees, shrubs and landscaping in general. We are helping many clients all over the Dallas Metroplex with similar issues but if you think about it we just had another late freeze on the night of April 14th so many plants are still waiting for the ground temperature to warm up before fully leafing out and recovering. Try cutting back any obvious dead foliage and do a heavy feeding, I think you might be surprised in another 30-45 days how tough your plants actually are. Give them a fighting chance and they will be stronger for it next winter, you can always replace some at that point if need be. Until next time....Happy Gardening!!

KEYS TO A "PROSPERING" LAWN IN DFW AREA

WHAT YOU NEED TO KNOW TO ENSURE HEALTHY TURF


1. MOWING

Timely mowing will have a big impact on health, weed control and thickness of your lawn. The general rule of
thumb to go by is to remove not more than one-third of the leaf blade at any one time. For some turf grass varieties, this could actually mean mowing every 3-5 days during summer when growth is most active.

2. WATERING

Water as deeply and infrequently as possible during dry spells, ideally 1 to 1-1/2 inches per week, depending on soil type. Watering every 3 to 5 days, even in the hottest days of summer, should be sufficient if you water deeply.

3. AERATING

Aerating is a mechanical method that pulls cores of soil from the lawn to allow better penetration of air and water. The best time of year to aerate is from mid-May through June, although July and August are also acceptable months as well.

4. VERTICUTTING

Also known as vertical mowing, this process thins and rejuvenates the lawn. When used on warm-season turf grasses, verticutting functions as a different form of aeration. Verticutting is used with cool-season turf grasses when overseeding in the fall. It thins the turf and allows the seed to fall through the grass and make contact with the soil. Thus improving your seed germination.

5. FERTILIZING

Most of our lawns in North Texas are best fertilized using a 3-1-2-ratio fertilizer. An example would be 15-5-10 or 24-8-16. The first number on the bag is Nitrogen. You can apply the fertilizer every 6 to 8 weeks. To prolong the greening between applications, use a fertilizer product that has its nitrogen in a slow release form. An organic method is to apply ½ inch of well-decomposed compost evenly across the lawn twice a year.

6. PRE-EMERGENT WEED CONTROL

Pre-emergents disrupt seeding development, so the timing of your treatments is crucial. Spring applications of Balan, Betasan, Dimension, Team or other labeled products should be applied around March 1st and again around June 1st for summer annual grassy weeds. Your fall treatments should be applied around September 10th using two different pre-emergent products on the same day. The first is for grassy winter annual weeds, using any of the previously named products. The second is to apply Portrait or Gallery next to prevent winter annual broadleaf weeds.

7. POST-EMERGENT WEED CONTROL

Broadleaf weeds are controlled with an herbicide containing 2,4-d. Use a dedicated sprayer and apply at the labeled rate according to turf type when temperatures are between 55 and 85 F. In Bermuda grass lawns only, grassy weeds are controlled with DSMA or MSMA between May and September. Nutgrass can be reduced over several seasons by applying Image or Manage between May and mid-September.

8. TREATING DISEASES

For brown patch in St. Augustine, treat the area around affected patches with Terraclor or Bayleton in late spring and especially early fall. Leaf spot diseases in turf grasses are controlled with Daconil, Banner, or Mancozeb. Avoid fertilizing when a disease is present in your yard.
 
9. CONTROLLING INSECTS

Generally found in hot, sunny areas of St. Augustine lawns, chinch bugs have an irregular feeding pattern from June through August. Water before and after treatment with a granular Talstar or synthetic pyrethroid product. Grub worm activity usually starts in early August and continues until early November. If discolored areas of turf pull up easily and 4 to 6 grub worms are present in a 1-square-foot area, treat with a granular Mach II, Merit or a pyrethroid product and water into soil.

Prior to making any pesticide application to your lawn, please be responsible by correctly identifying the problem you have. Pesticide labels are frequently amended, added or deleted for specific crops or pests. Therefore carefully examine the actual label of the pesticide product before use. Please read and follow all label directions.

Question: Jimmie,  We recently purchased a home in a older neighborhood with established trees. Our grass underneath these beautiful trees is very thin and appears to be slowly dying. Our neighbors we have talked experienced the same things over the last few years. What is your opinion on our options for those areas? Pamela L. in Dallas

Answer: Hi Pamela, you are simply experiencing the light condition changing over time underneath the canopy of your trees. A very common issue in more established Dallas neighborhoods. More than likely you had a Bermuda lawn (which requires full sun) that now had less than adequate light and is slowly fading away. The good news is you have magnificent trees!! Your best options are to consider either replacing the sod with a more shade loving turf such as St. Augustine or a pricier Zoysia (if you prefer the Bermuda blade look) or consider a flower bed that can take up that area and soften the under canopy of your trees and trunks. Just be sure to consider what your lifestyle will accommodate both when it comes to maintaining one or the other.


Question: Jimmie, first off I would like to thank you for taking the time out of your busy schedule to write this column. It has been very informative and helpful to me and I really look forward to it. My problem is that I have a Japanese Maple tree that I mistakenly planted last year in full sun. Well, it just fried in the summer! Late summer I moved it to a side yard where we can now see it out our window. It gets the midday sun now. Do you think it will be okay there? Jennifer P. in Frisco.

Answer: Hi Jennifer, Sounds like you Japanese Maple has been put through allot of extremes since you have owned it. It will be happier there however it really should be allowed to acclimate a year or two before passing judgment on it. Also your timing on the transplant could have been better. That really should be done in a dormant time when it’s bare and not as much stress through the acclimation process. It eventually should be in a spot where its gets little to no direct sunlight at all. Until next time…Happy Gardening!!


Monday, March 31, 2014

NOW THAT SPRING IS HERE, IT’S TIME FOR:


Planting


  • New lawns can be started this month. Sod can be planted at anytime, but wait until soil has warmed up enough to plant Bermuda seed.
  • Warm season vegetables including beans, tomatoes, corn, squash, cucumbers, melons and peppers 2 weeks after last freeze. Summer vegetables, including okra, eggplant, southern peas 4 weeks after last freeze.
  • Warm season annuals including begonias, impatiens, zinnias, marigolds, cosmos, celosia, 2 weeks after last freeze. Tropical annual color plants, including hibiscus, pentas, fire bush, copper plant, purslane, moss rose, purple fountain grass, caladiums, lantanas, 4 weeks after last freeze.
  • Groundcovers into well prepared soil to take advantage of the burst of new spring growth.
  • Herbs into flowerbeds, vegetable gardens and patio containers. Many herbs are attractive as well as edible.
  • Trees and shrubs are available in profusion this month. Transport them home carefully, protecting them from highway winds, the plant them immediately. Hand water tem regularly during first summer.

Pruning         

           
  • Climbing roses, also antique roses that only bloom in spring, following flowering to remove weak growth and reshape plants.
  • Spring flowering shrubs and vines to reshape immediately after they finish blooming.
  • Low hanging limbs from shade trees to allow sunlight to reach grass beneath canopy.
  • Tropicals, such as hibiscus, that have grown lanky over a winter indoors can be trimmed back now.

Fertilize


  • All lawn grasses should be fed this month. Use high quality nitrogen or all-nitrogen plant food.
  • Container gardens. Use complete-and-balanced, water-soluble fertilizer such as 20-20-20 with trace elements. Apply diluted solution with each watering.
  • Roses monthly with specialty rose food.
  • Use iron additive with sulfur soil acidifier to correct iron chlorosis (yellow leaves with dark green veins) Keep iron products off masonry, painted surfaces that could be stained.


On the Lookout


  • Cankerworms strip new leaves from trees. Larvae will hang by very thin threads from trees. Bacillus thuringiensis biological worm spray is best control.
  • Cabbage loopers with same B. T. spray or dust.
  • Snails, slugs, pill bugs devour tender new stem, leaf growth, apply dust or specialty bait.
  • Leaf rollers tie leaves of cannas, sweetgums, redbuds, pyracanthas, and others together. Apply systemic insecticide for ongoing protection before problems become serious.
  • Thrips cause roses and other double flowers to fail to open, turn brown around petals edges. Systemic insecticide to control.
  • Aphids on brand new growth of daylilies, tomatoes, roses and a host of other plants. General-purpose insecticide will eliminate.
  • Fire ants. Treat with wide area baits and individual mound treatments or hire pest control professional who can apply new yearlong product.
  • Fleas. Treat with broad-spectrum landscape insecticide. Apply preventive from vet to pet’s neck.
  • Roses for black spot and mildew. Use labeled fungicide weekly into the summer.
  • Powdery mildew on new growth of crape myrtles, zinnias, euonymus. Treat with approved fungicide or spray with soapy water.
  • Maroon colored freckles on leaved of red tip photinias, Indian hawthorns suggest fungal leaf spot. Treat with approved fungicide, but be prepared to replace plants. This disease is epidemic.
  • Broadleaf weed killer to eliminate existing clover, dandelions, dichondra, wild violets, and poison ivy.


Color in your landscape tip:

Warm colors (yellow, orange, hot pink, bright red, white) advance visually in the garden, while cool colors (green, blue, purple) recede. Use warm colors where color will be seen from a distance. Use cool colors to make a small landscape appear larger.


Question:
Jimmie, Is it normal for this time of year to have pillbugs around my entry to my house. I am a fairly new homeowner and this is the first time I have seen them?? Thank you for your help. Julie L. in Prosper.

Answer: Hi Julie, Pill bugs can generally show about just about anywhere they feel like it. Really, the only time you should be concerned about them is when they start feeding on your young tender stems and leaves in the area you’re seeing them. Most plants will still outgrow them, but if you have the need to control them, slug and snail baits available at most nursery’s does a good job. Sevin dust works also.
Question: Jimmie, my favorite tree has become the Japanese Maple. While I don't know much about them I just love the texture and color of them, especially the weeping kind. Can this tree be installed anywhere on my property with good soil preparation? I will probably be calling your company to help us! Melissa K. in Prosper

Answer:  Hi Melissa, one of my favorite trees as well. The Japanese Maple is actually native to China but the main growers in the USA are around the Washington, Oregon areas that supply most of the country. They love shade and when designed or installed in the incorrect location in your landscaping can really struggle. A dapple of morning sun and afternoon shade we do the trick. Probably East or North side of your house preferably under the canopy of a large anchor existing tree if you have one would be even better. Be glad to help you out if you need it.


 Until next time, happy gardening………..!!!